- I progetti dei grandi maestri -
Butterfly wedding cake di Vivian Lee
Questo articolo è stato pubblicato sulla rivista “Cakes and sugarcraft” n. 108 edizione primavera 2010
----------------------------------


FOOTNOTES
This wedding cake in royal icing was originally designed and built for the competition of Squires Kitchen Exhibition 2009 edition, but has never been exposed since it was accidentally destroyed!. I played on the occasion of the magazine "Cakes and Sugarcraft," and so finally was photographed intact.
This design can be pretty much an interesting project for those who already have some experience in royal icing and is looking for a challenge to himself. This cake is dedicated to my dear brother and his wife Ruby On.

Needed:
A "fruit cake" with a diameter of 15 cm. (The fruit cake is a traditional English pie widely used as a base for cakes covered in royal icing and decorated)
apricot jelly
500 g marzipan (squires kitchen marzipan)
zucchero a velo (per spolverare)
“Squires Kitchen extra fine bridal icing” (zucchero a velo impalpabile che in questo caso viene utilizzato per la ghiaccia di copertura)
Glicerina (squires kitchen glycerine)
Squires kitchen instant mix professional royal icing (una polvere già pronta da diluire in acqua per preparare la royal icing) per le decorazioni realizzate con i beccucci
Brillantini (Squires Kitchen magic sparkles)
Piping gel (Squires Kitchen piping gel) è uno speciale gel che impedisce alla royal icing di seccare troppo per renderla più morbida al taglio.
pastry brush
2 x 25.5cm square side (one spare ...)
smoother rolling pin (it's a kind of "plane" that serves to level the fondant or marzipan to the cake and have it fit perfectly)
boxcutter
turntable
small and large spatula
bar to level the top of the cake (straight edge - similar to a ruler long metal, is used to pull the ice,'s perfect ...)
metal spatula to level the side of the cake (metal scraper side - metal spatula around side 12x11cm serves to level the cake)
punch (scriber) is a kind of metal pencil to engrave a design on the cake
spouts No 0, 1, 1.5, and 2
small disposable cones (type pastry bag) in parchment paper
acetate sheet
brushes
4 small square trays side 30.5cm (3 spare)
1.8mt of white satin ribbon (15mm height)
double-sided tape
Procedure:
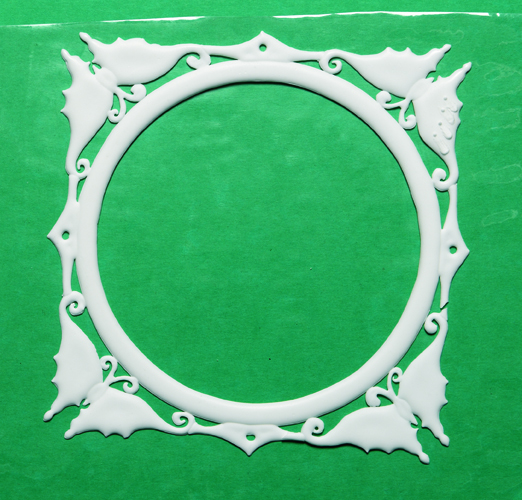
prepare the basis for the royal icing:
1 if the cake has risen to the center and has an irregular surface, cut off the upper level. We turn the cake upside down, the base of the cake becomes the top.
Brush the top of the cake with apricot jelly
2 marzipan work until it is soft and malleable, stendiamolo in a layer of 5mm thick.
takes the cake, and capovolgiamola appoggiamola on marzipan (the surface that we have just brushed with apricot jelly join the marzipan) let's wrap tightly and cut the excess marzipan around.
Flip the cake again to find the layer of marzipan on top.
3 Place the cake on the tray temporarily 25.5cm side (spare), we measure the circumference of the cake. Roll out and cut a strip of marzipan to size.

4 Brush sides of cake with apricot jelly. Wrap the strip of marzipan su se stessa (come fosse una benda) e quindi srotoliamo il marzapane delicatamente attorno alla torta, premendo con le mani man mano che srotoliamo il marzapane. Togliamo l’eccesso di marzapane e lasciamo riposare prima di coprire con la royal icing.
Copertura della torta con royal icing
1 Il giorno prima della copertura, prepariamo una porzione di ghiaccia utilizzando la Extra fine bridal icing seguendo le istruzioni sulla confezione.
Portiamo la ghiaccia ad una consistenza “soft peak” (una consistenza mediamente morbida), aggiungiamo un cucchiaino da Glycerol SK you every 500g of ice.
2 Place the cake on the turntable. Located at approximately 130g of ice at the center of the cake. Using a spatula, smooth out the ice on top of the cake spatula with movements of the left and right as if "remassimo" (this will eliminate any air bubbles and imperfections)
3 Remove the cake from turntable . Now use the long blade (straight edge) metal level with a single touch the surface of the cake, we finish the top edge of the ice by removing the excess with a spatula. Let dry completely cover the first to proceed with the sides of the cake.
4 Put the cake on the turntable. Using a spatula, we place the ice on the sides of the cake, paddle well and trying to cover the entire board.
5 Use the spatula to the side to side metal scraper), starting from the side of the cake as far away from our. right hand. We hold the paddle very tightly and perfectly appoggiamola right angle between the side of the cake and the base of the tray. Keeping this position, moving firmly and continuously (without lifting the spatula from the cake ...) we draw toward us (clockwise) by the spatula rotate with the turntable the other hand (counter-clockwise). When we made the full lap gently pull the spatula from the edge of the pie.
6 Remove any excess with a spatula and ice from the top to the lower one, namely that sits on the tray (very carefully). At this point, the first covering is completed.
7 Let the icing dry completely and repeat the same operation as a cover for 2 more times for a total of 3 shell.
Scheme for the flowers:

1 Riproduciamo il disegno dei fiorellini e dei rami posizionando lo schema sulla torta e tracciando le linee principali con lo scriber
2 Posizioniamo la torta sul piatto girevole. Realizziamo le linee del disegno utilizzando un beccuccio n. 0 con ghiaccia “soft peak”
3 Realizziamo i fiorellini più piccoli utilizzando lo stesso beccuccio n. 0 con una consistenza soft peak.
4 Andreamo a creare ora i fiori più grandi utilizzando la tecnica del brush embroidery: tracciamo la linea esterna di ciascun petal then using a small brush moistened brush the ice by pulling the brush toward the center of the petal. This operation deve'essere done fairly quickly, otherwise the danger of dry ice. We make a flower at a time. We clean the brush right at the end of each flower. We create the small dots in the center of each flower.
5 also prepare some flowers by the method of brush embroidery on a sheet of acetate. Brushes with the flowers a bit 'of glitter. Once dry, gently lift the flowers dall'acetato helping with a spatula and glue the flowers to the cake with a little 'real ice.
Trays
prepare a portion of an Instant Mix SK Professional royal icing without adding glycerol.
2 Cover with the prepared icing (consistency "soft peak") the surface and sides of the trays 25.5cm and 30.5. Repeat this a second time leaving a shutter speed of the other coverage.
3 Secure the tray smaller than the exact center of the greatest help with some 'real ice that will be the glue between the two trays.
4 Posizioniamo i vassoi sul piatto girevole e tracciamo sui lati il motivo decorativo (come da foto) aiutandoci con lo scriber.
Posizioniamo il nastro di raso lungo il bordo dei vassoi fissando con il nastro biadesivo.
6 Utilizziamo un conetto n.1 con una ghiaccia “soft peak” e decoriamo i lati dei vassoi seguendo il motivo che abbiamo appena inciso sul bordo con lo scriber.
Collare “farfalla”


1 Posizioniamo lo schema del disegno del collare su un vassoio di 30.5cm e sovrapponiamo un foglio di acetato. Fissiamo bene il foglio di acetato sul vassoio con del nastro adesivo lungo i bordi del foglio.
2 Seguiamo le linee esterne del disegno utilizzando un beccuccio n. 1 e della ghiaccia consistenza “soft peak”.
3 Riempiamo il disegno con ghiaccia fluida (all’interno delle linee tracciate) consistenza run-out.. Realizziamo 2 collari in questo modo e lasciamoli ad asciugare su una superficie piana.
4 Misceliamo una piccola quantità di SK piping gel in un cucchiaio di ghiaccia. Usando un beccuccio n. 1.5 realizziamo quattro o cinque puntini lungo il lato esterno delle ali della farfalla ed usiamo immediatamente un piccolo pennello inumidito per pennellare i puntini dall’esterno verso il corpo della farfalla, realizzando un motivo a “goccia”. Inseriamo dei piccoli puntini di ghiaccia sulle ali della farfalla alla fine di ogni goccia (come da foto).
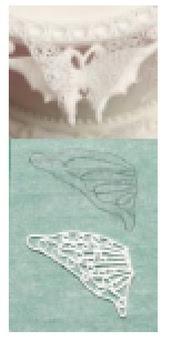
5 Con un beccuccio 1.5 e della ghiaccia consistenza “full pick” riproduciamo il disegno del cerchio interno del collar (il motivo a cerchi puntinato). Lasciamo asciugare perfettamente prima di incollarlo sopra al collare superiore aiutandoci con della ghiaccia
6 Fissiamo un piccolo pezzo di acetato su un vassoio con del nastro adesivo. Posizioniamo lo schema delle ali ricamate della farfalla tra il vassoio ed il foglio di acetato e realizziamo il disegno delle ali con un beccuccio nr. 1 ed una ghiaccia consistenza “soft peak”. Togliamo lo schema del disegno da sotto l’acetato delicatamente, giriamolo (in modo da avere il disegno al contrario per realizzare l’ala opposta) riposizioniamolo sotto l’acetato e realizziamo la seconda ala. Realizziamo otto coppie di ali in tutto. Lasciamole asciugare.
7 Solleviamo molto delicatamente le ali ricamate dall’acetato helping with a spatula. Paste the wings of butterflies embroidered on the plea made in the "collars" helping us with a little ice. We support the wings under them by inserting a small piece of foam until they are completely dry.
Top cake

1 Place the pattern of the top of the cake in a tray and an acetate sheet fixed with adhesive tape. We follow all lines of the drawing with the ice consistency "full pick" (the more rigid consistency, to "tips straight") using a cone number. 1. Let it dry and go over the design with the ice a second time.
2 Lift (very gently) dall'acetato the drawing made, using a spatula, and giriamolo the other side. Go over all the design from this side with the same ice and let it dry. We need to make 6 equal panels.
3 helping assemble the 6 panels with a touch of ice, one at a time, by placing small pieces of foam between the panels to hold the shape until it dries well. Finished with a row of dots of icing to hide the hanging of the panels.

realize a 4 disk (which will serve as a base) as shown in diagram (base for cake tops) draw the outer circle with a spout no. 1 and "fill" on the ground with the ice consistency run-out. Let dry completely.
5 Dab the base of the ice texture "soft peak" using a small piece of sponge, in order to effect a "sponge" in fact ...
6 Attach the top to the base by helping with the ice

Assembly
1 position and fix the collar to the bottom tray and covered with ice made previously, using a bit 'of Royal icing. Making sure that the collar is perfectly in the center of the tray.
2 Gently place the cake on top of the collar.
3 Create a line of dots of icing along the top and bottom of the cake
4 We produce a line with the ice along the outer profile of the top of the cake to secure the upper collar, and very gently position the upper collar.
5 Place the topper in the center of the top of the cake.


